Geova AI review and voice readiness
Optional after Part 4 · Learning path · Sample counts
Use Geova AI to review the fictional Global Field Operations project across New York, London and Tokyo. This walkthrough continues after Standard capture, CAD and SHP, using the Mapplex demo workspace in night mode.
The current project contains 51 features: 39 inspection sites, 6 maintenance routes and 6 service zones. Earlier walkthrough images show the totals at their own capture step. The local Global Exchange Lab is a separate project and is excluded here.
These are real application captures. The refreshed AI analysis images use a larger 430 × 1000 phone viewport at three-times pixel resolution; the setup and voice-readiness images use 390 × 844. Tablet images use a 1024 × 768 viewport with the actual navigation rail collapsed. Select an image to view it at full size. The AI examples were checked against stored demo records; the voice section shows readiness, with the detailed enabled-workspace workflow linked separately.
1. Open the right project and assistant
Activate Global Field Operations in Projects. On a phone, open the menu and choose Geova AI Partner. On a tablet, choose Geova AI from the side navigation rail.
Check the project badge, 51 records and 3 layers before asking a question. The header label “Geova Network Active” is not a substitute for checking the outcome of an actual request.
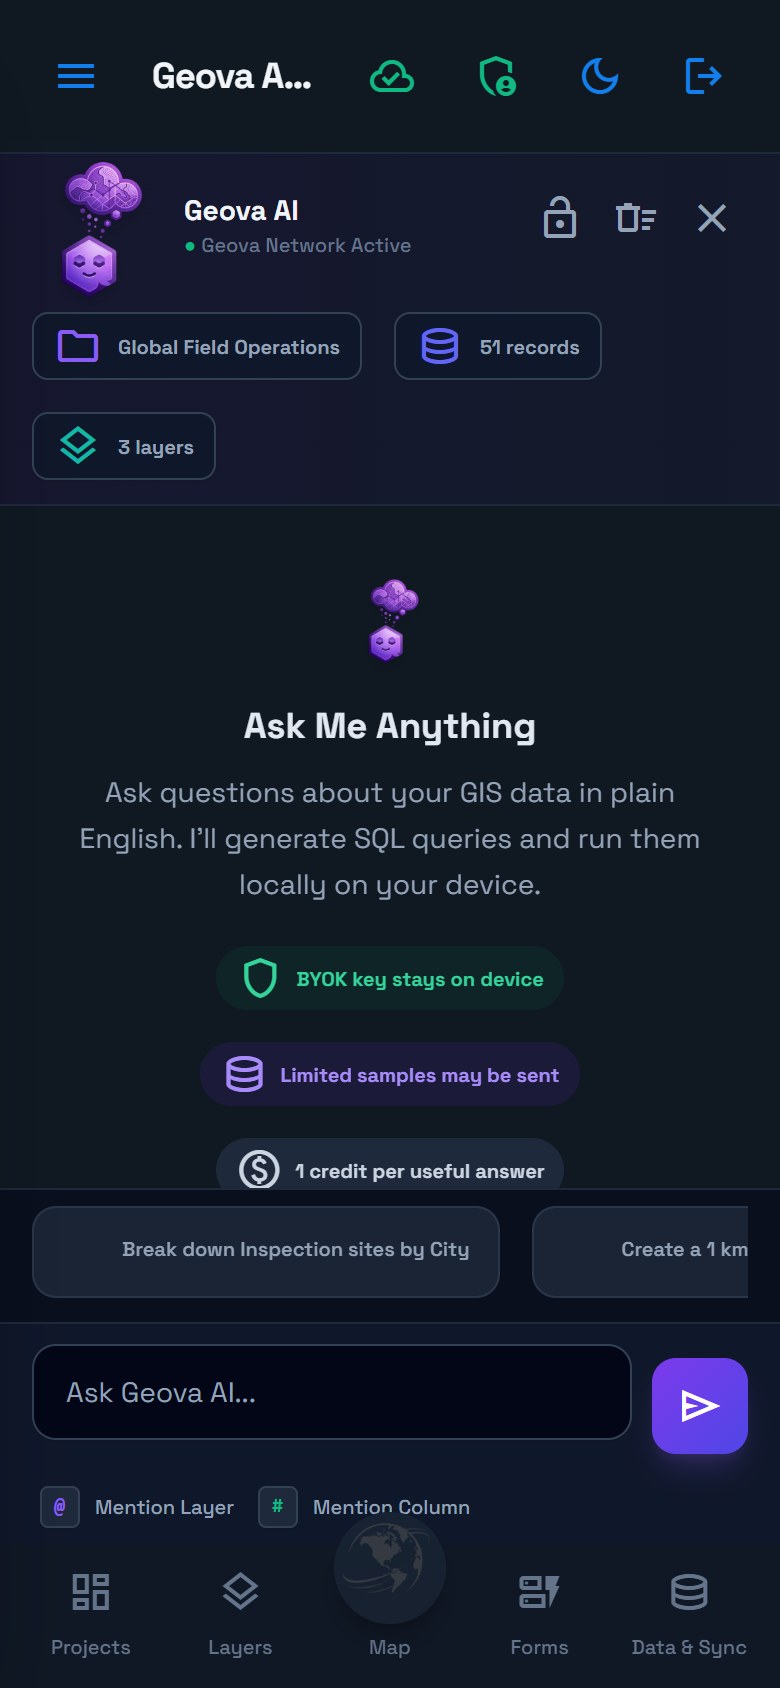
The welcome screen describes AI processing and credits. Read these together with AI privacy and data safety. Local query execution does not make every AI step offline or prevent permitted context from being processed by a service.
2. Explore before asking
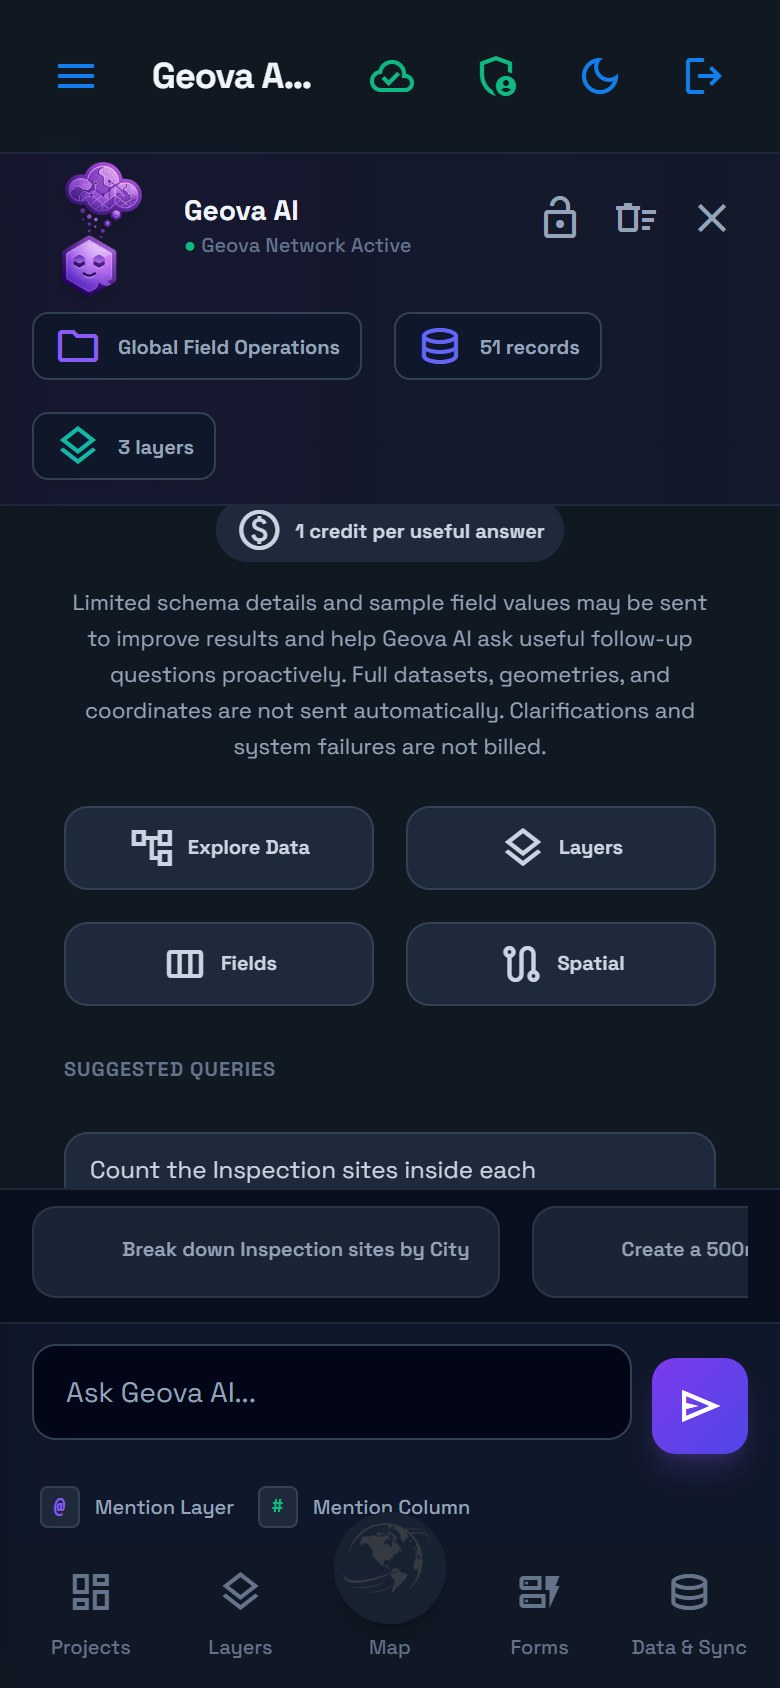
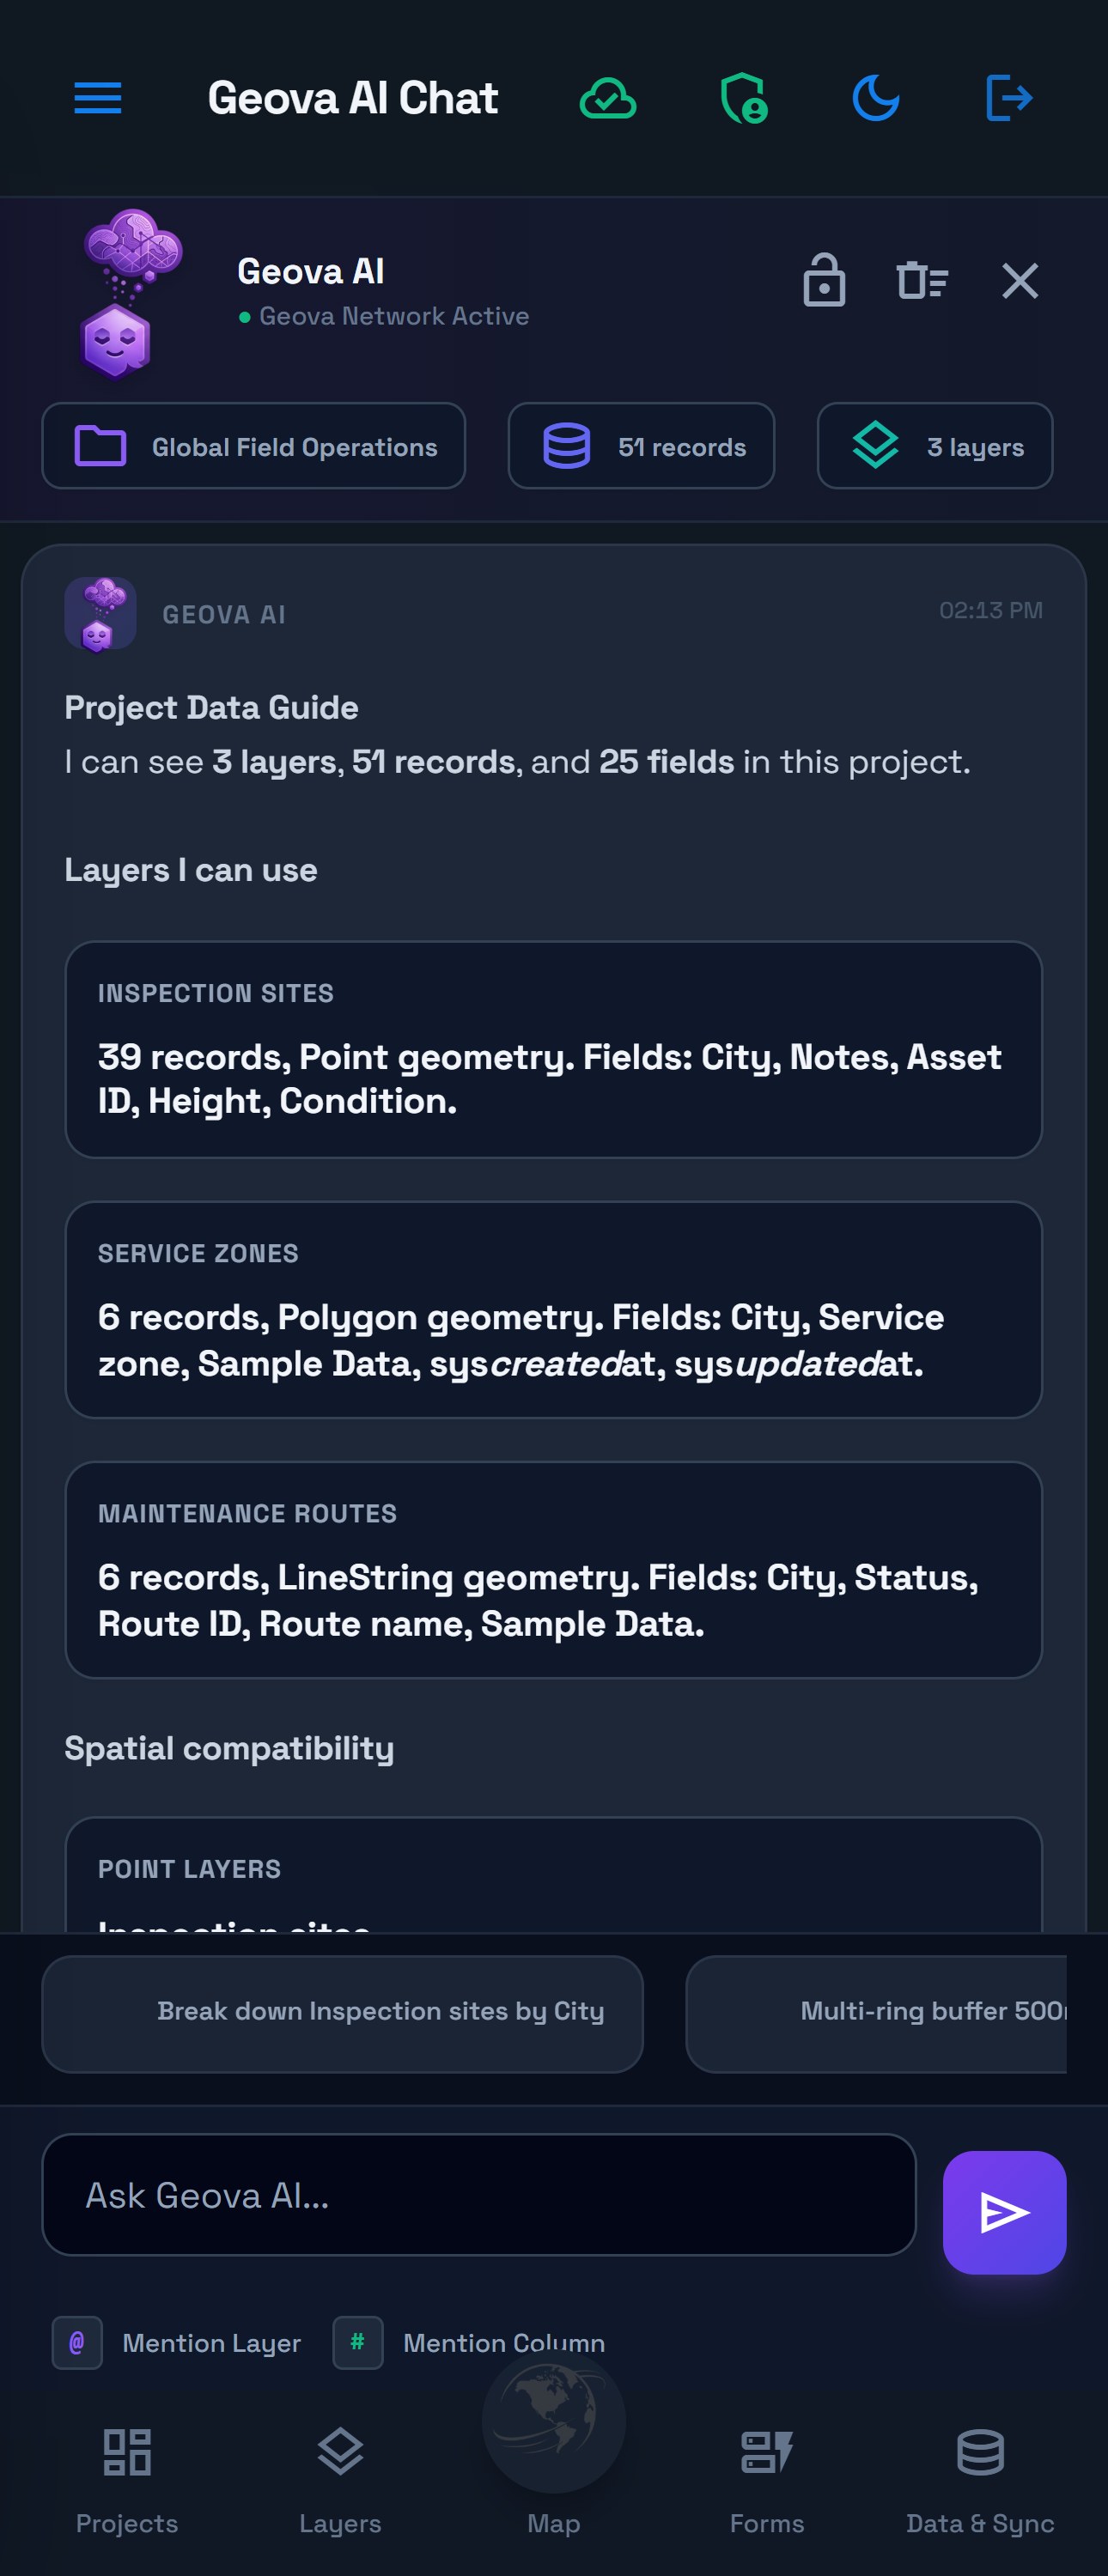
Scroll within the message area to find Explore Data, Layers, Fields and Spatial. Choose Explore Data for a local project guide. It lists available layers, record counts, useful fields and possible questions; its suggested analyses are starting points, not completed results.
See the tablet mode view
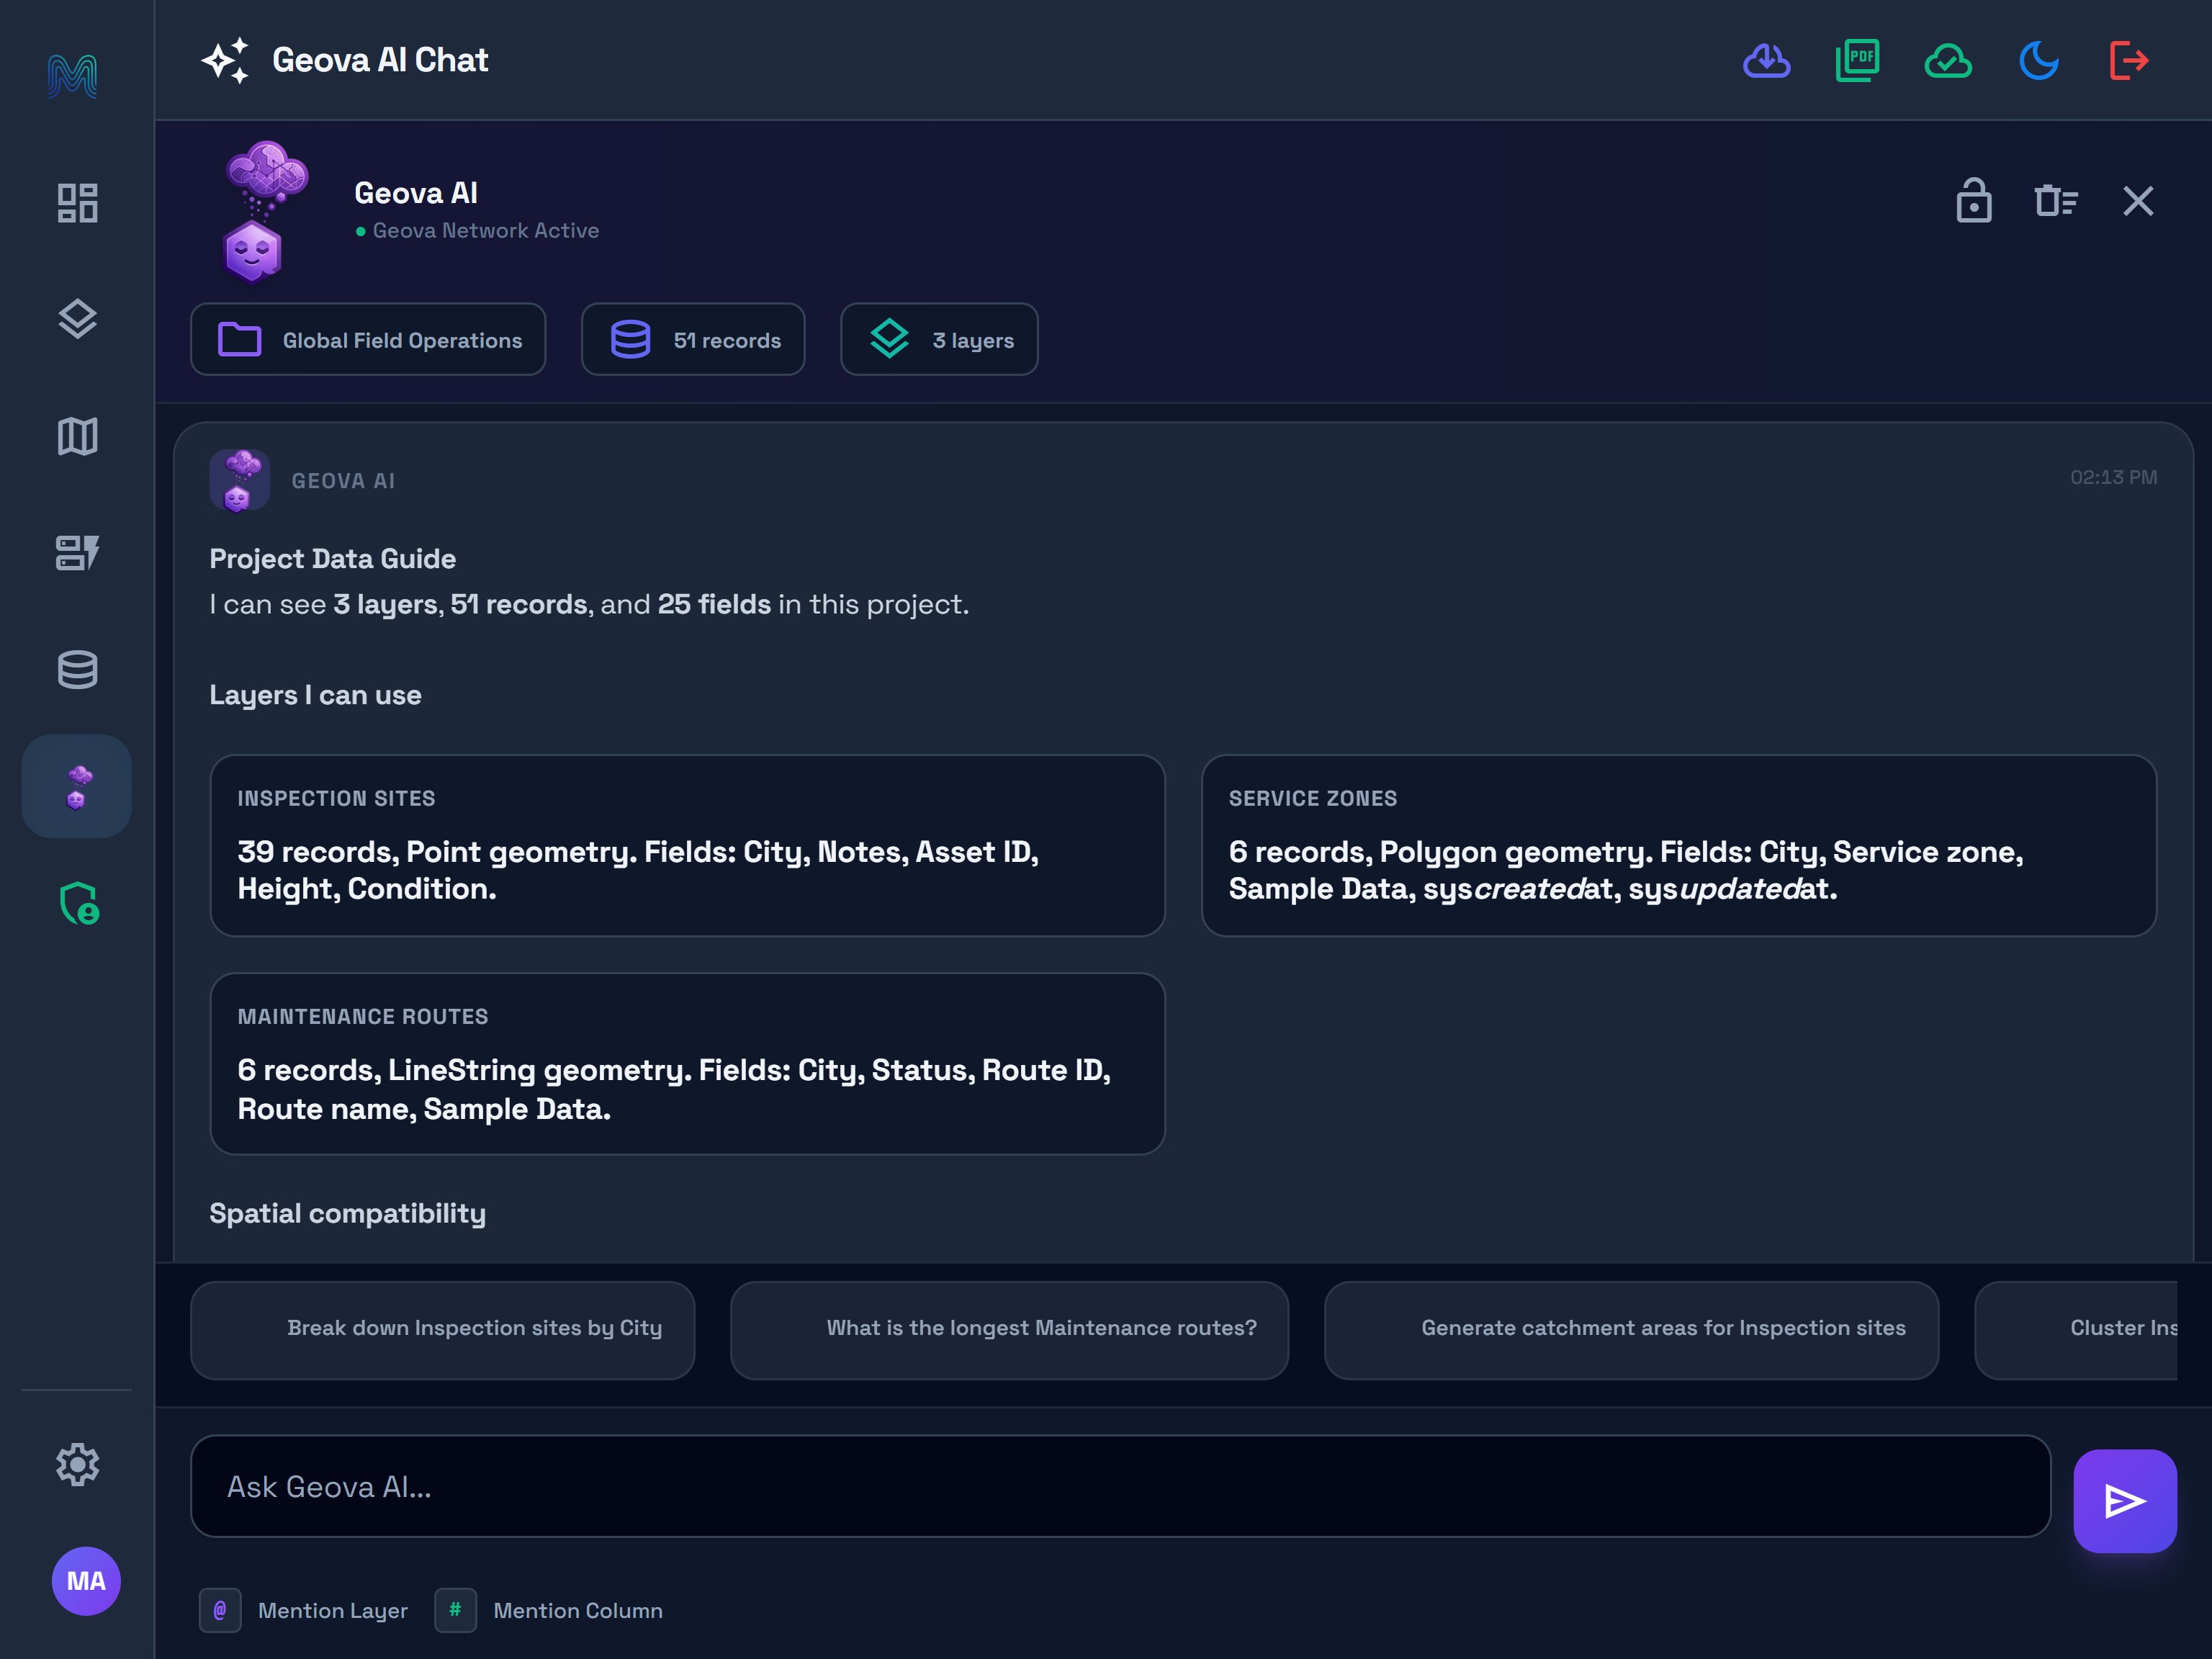
| Layer | Geometry | Expected records |
|---|---|---|
| Inspection sites | Point | 39 |
| Maintenance routes | Line | 6 |
| Service zones | Polygon | 6 |
3. Name the layer and field
Type @ to select a project layer. Type # to select a field. Choosing from the dropdown helps avoid confusing similarly named layers or fields.
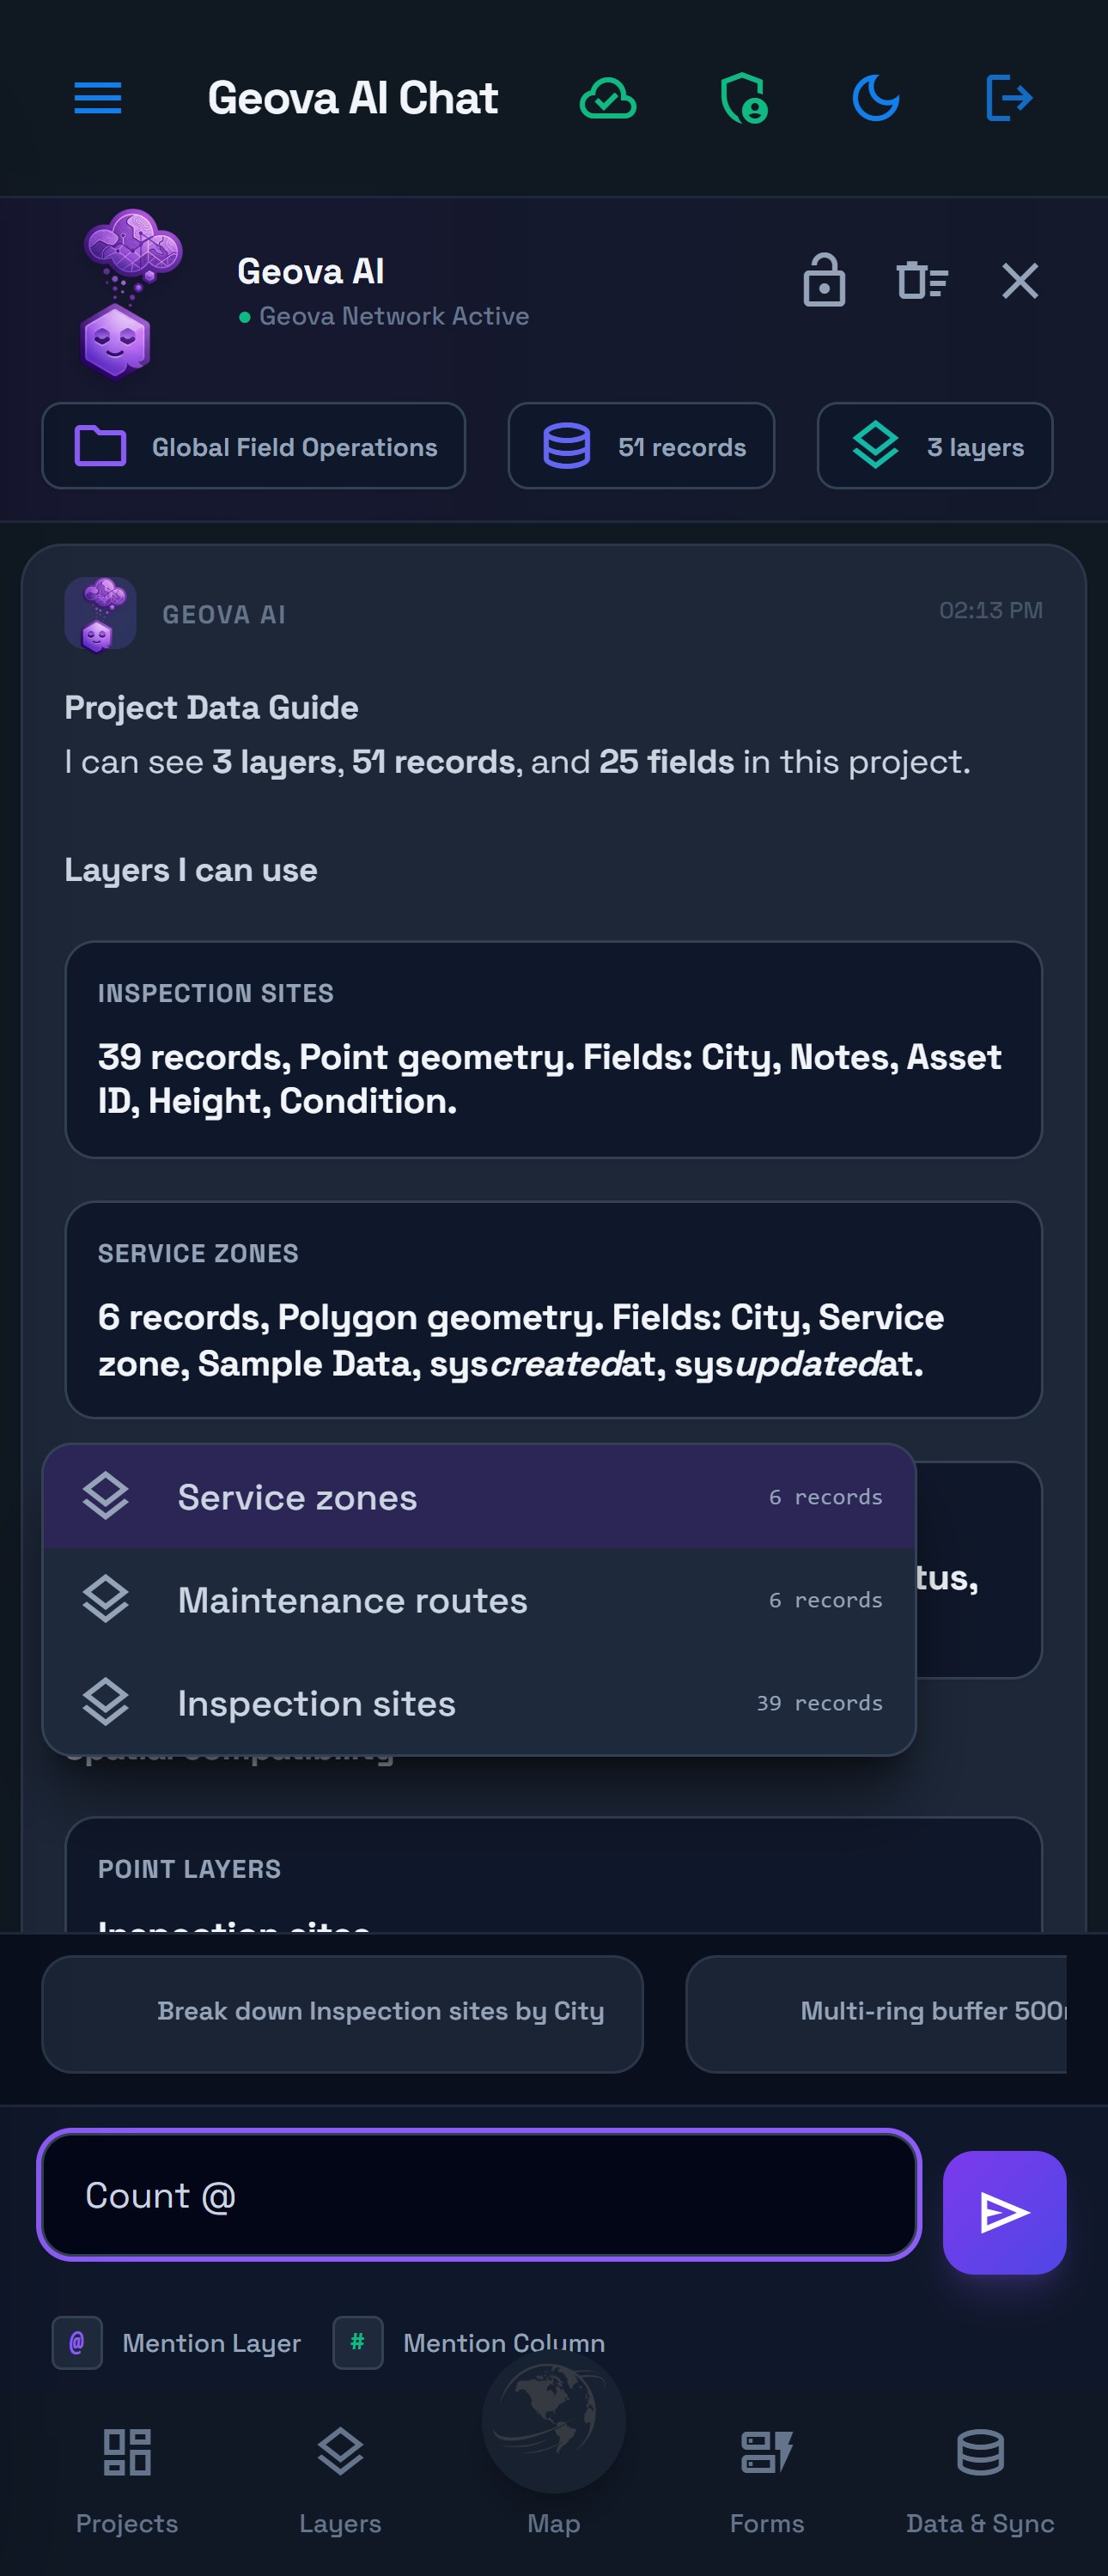
A simple first question is “Count Inspection sites”. The horizontal suggestion bar fills the input so you can edit it and choose Send. The larger Suggested Queries buttons on the welcome screen submit their question immediately. With a keyboard, Enter sends; Shift+Enter adds a new line.
4. Verify a whole-layer count
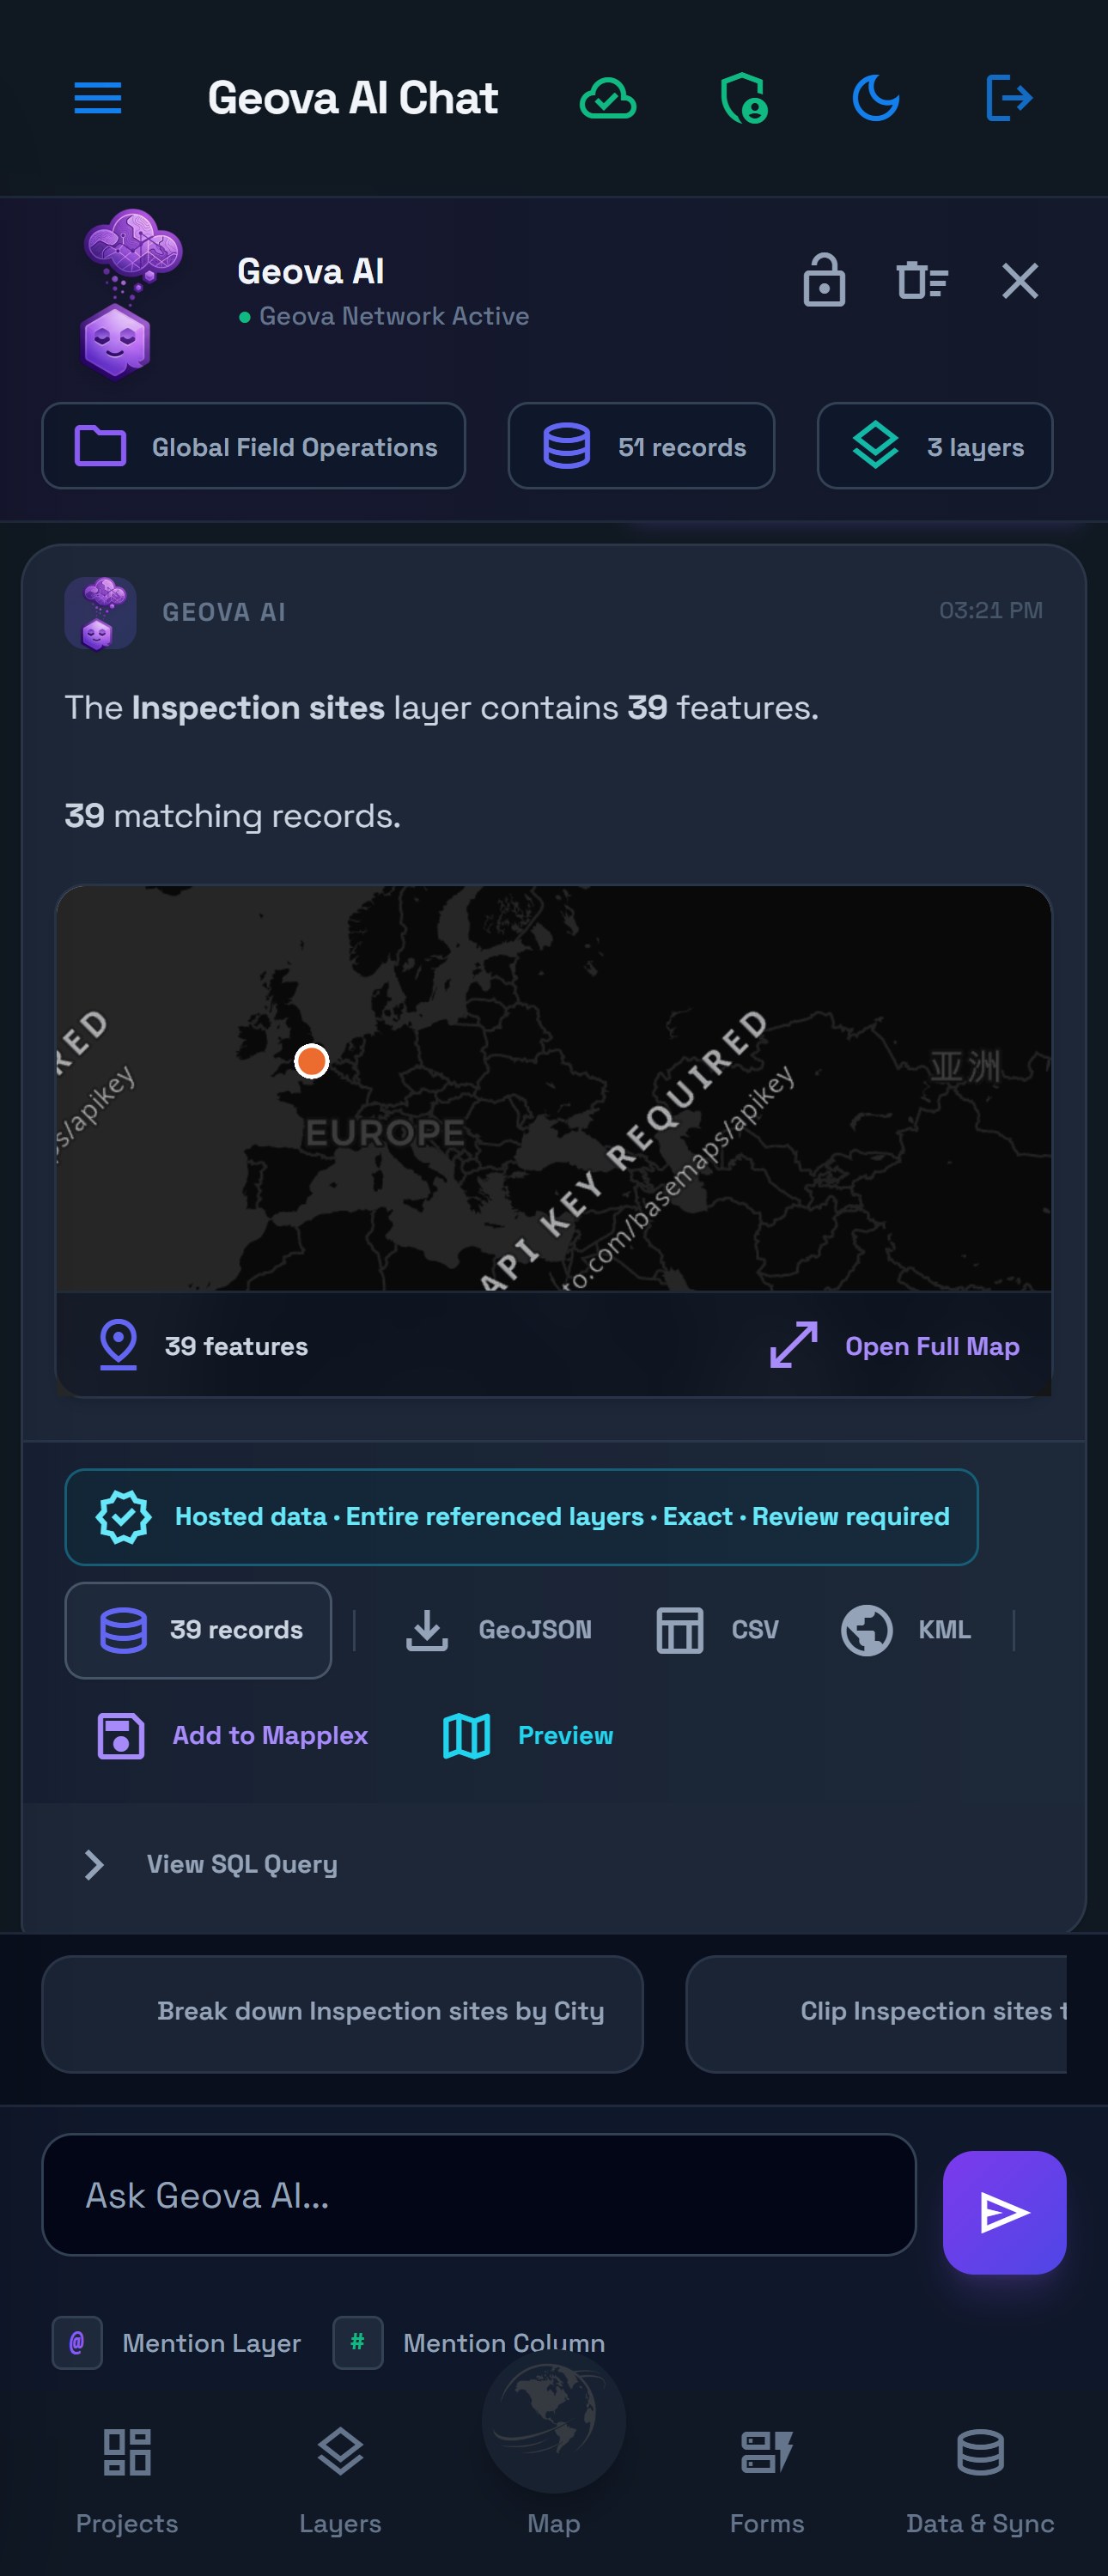
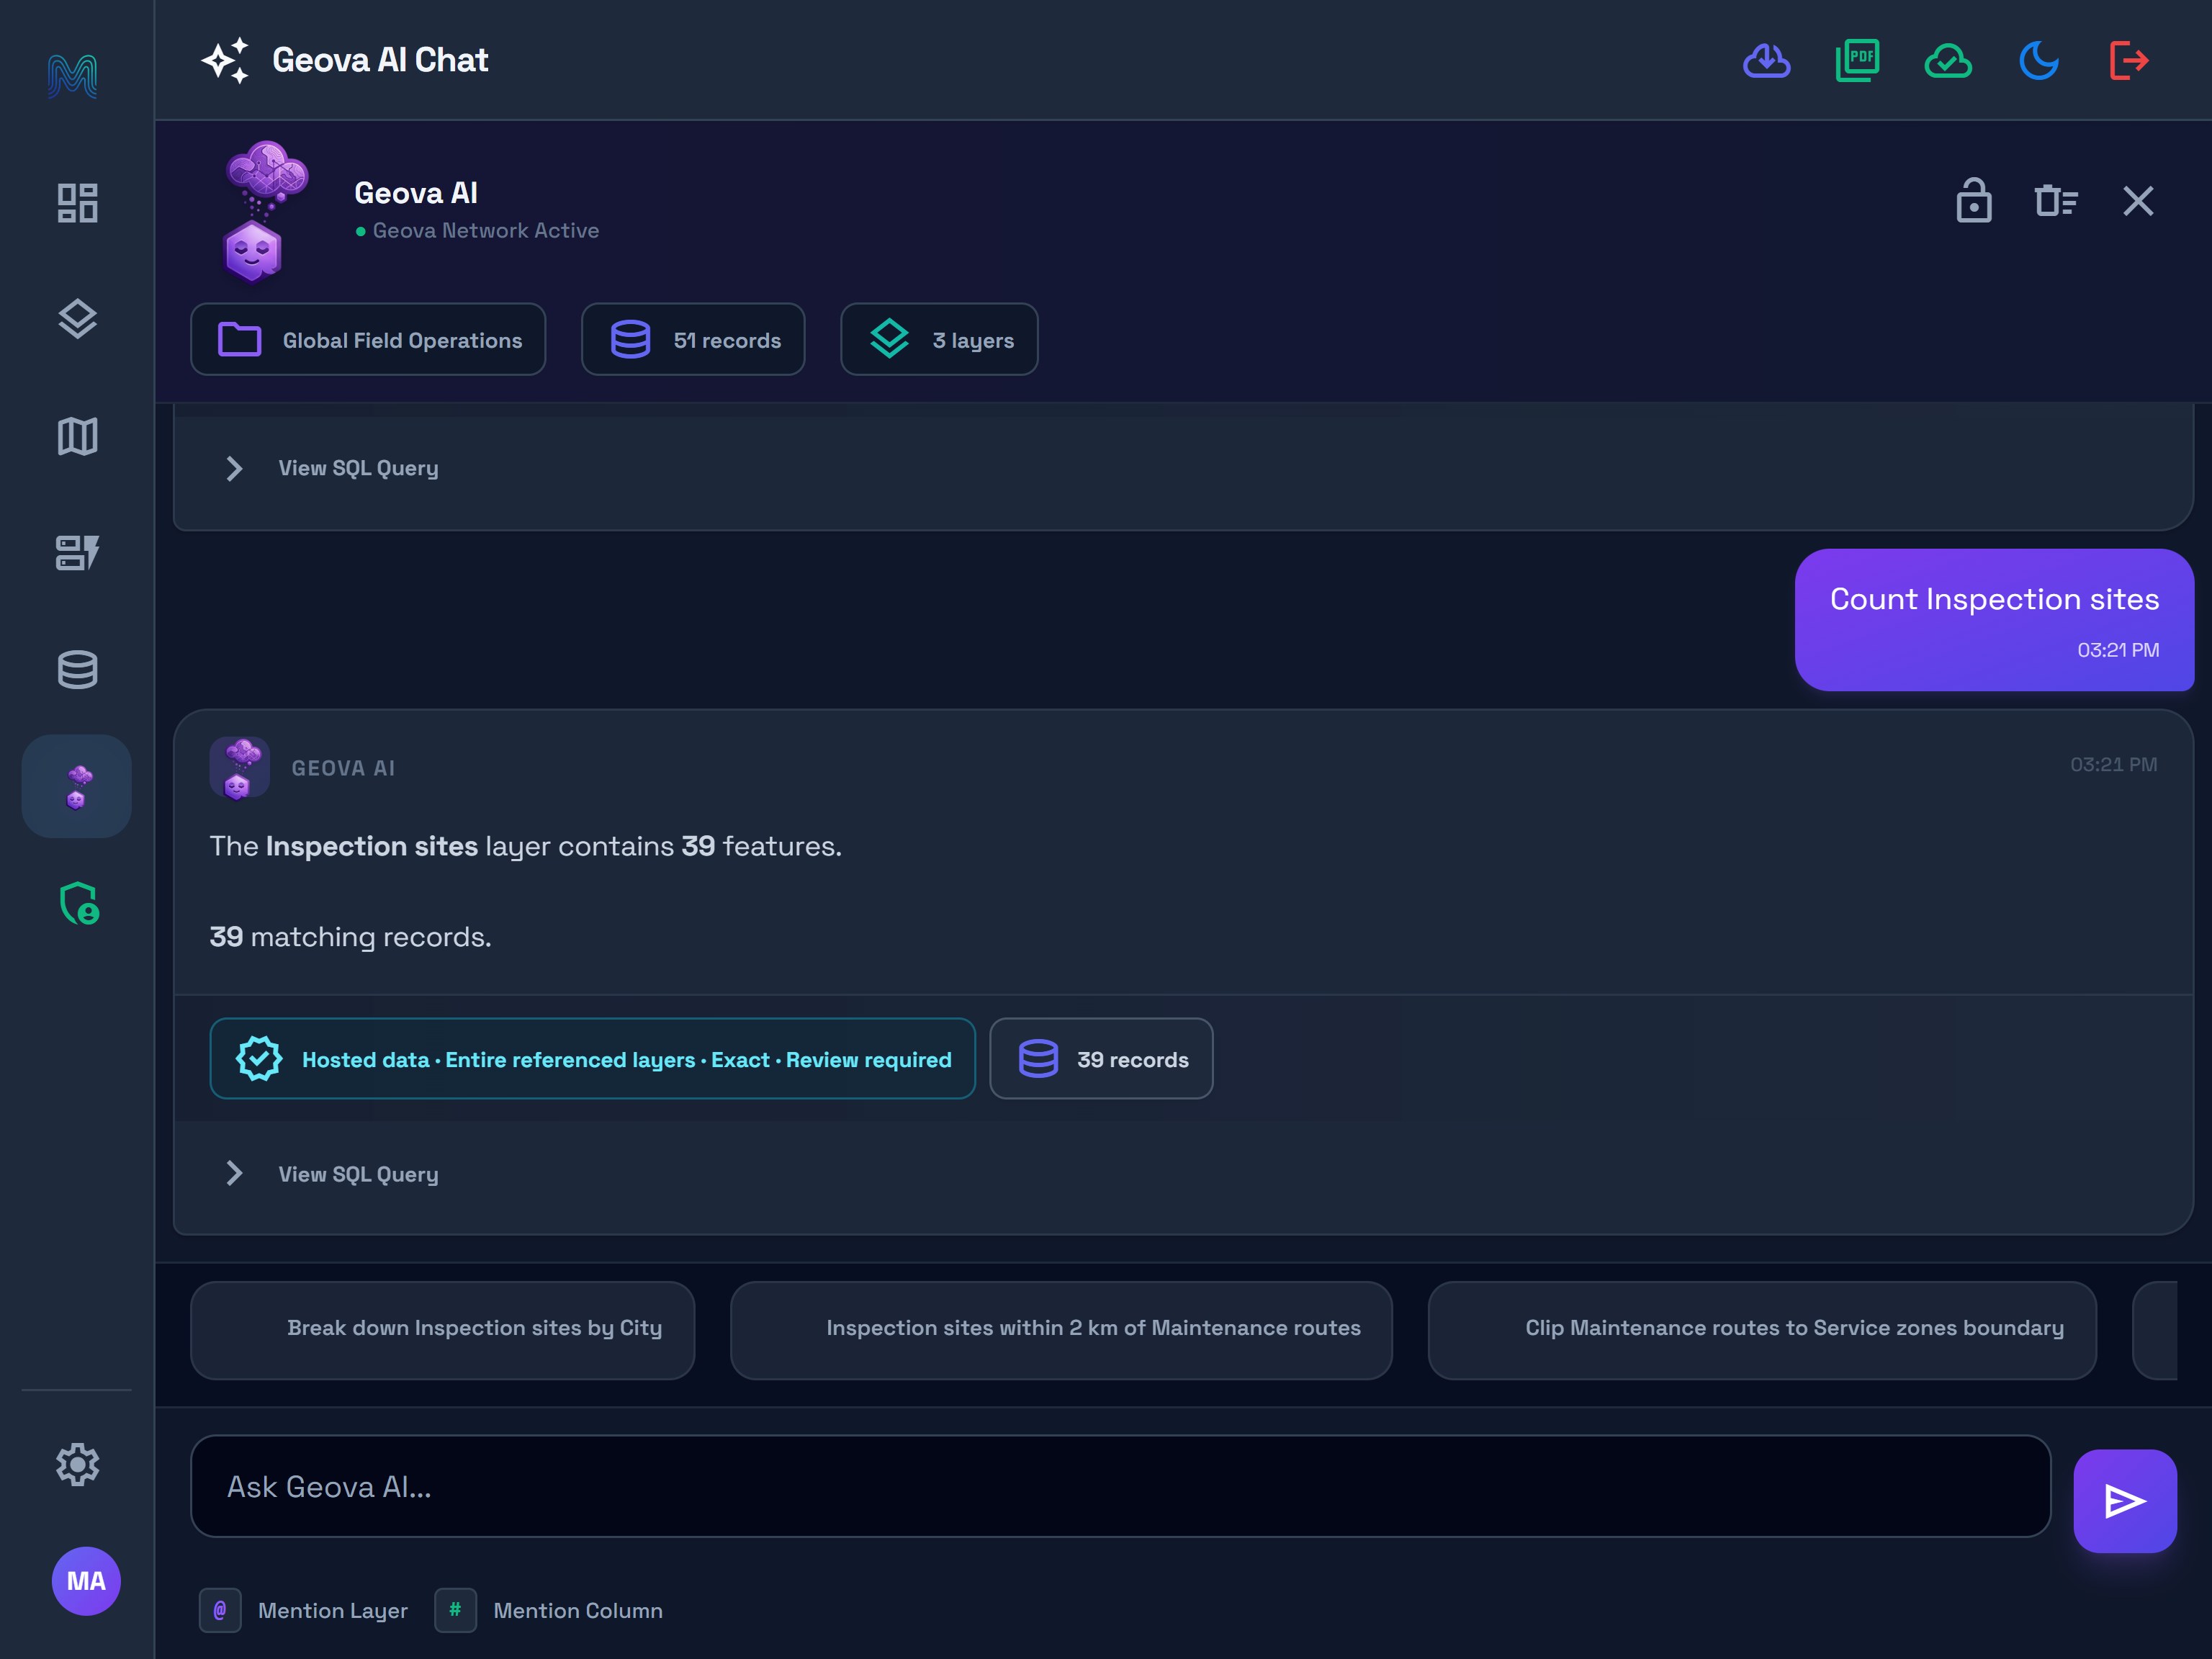
Send “Count Inspection sites”. In this demo, the answer is 39 features. That includes sites in all three cities; zooming the map into New York does not, by itself, restrict a whole-layer question to New York.
See the tablet mode view
If you want only selected features or the current map view, state that scope explicitly and check the returned scope. If the result differs from your expectation, check the active project, layer, filters and data availability before relying on it.
5. Inspect scope and query details
Read the badge beneath the answer. This example reports Hosted data · Entire referenced layers · Exact · Review required. Expand View SQL Query to inspect the underlying selection. Technical details are optional for routine use, but useful when checking which records were included.
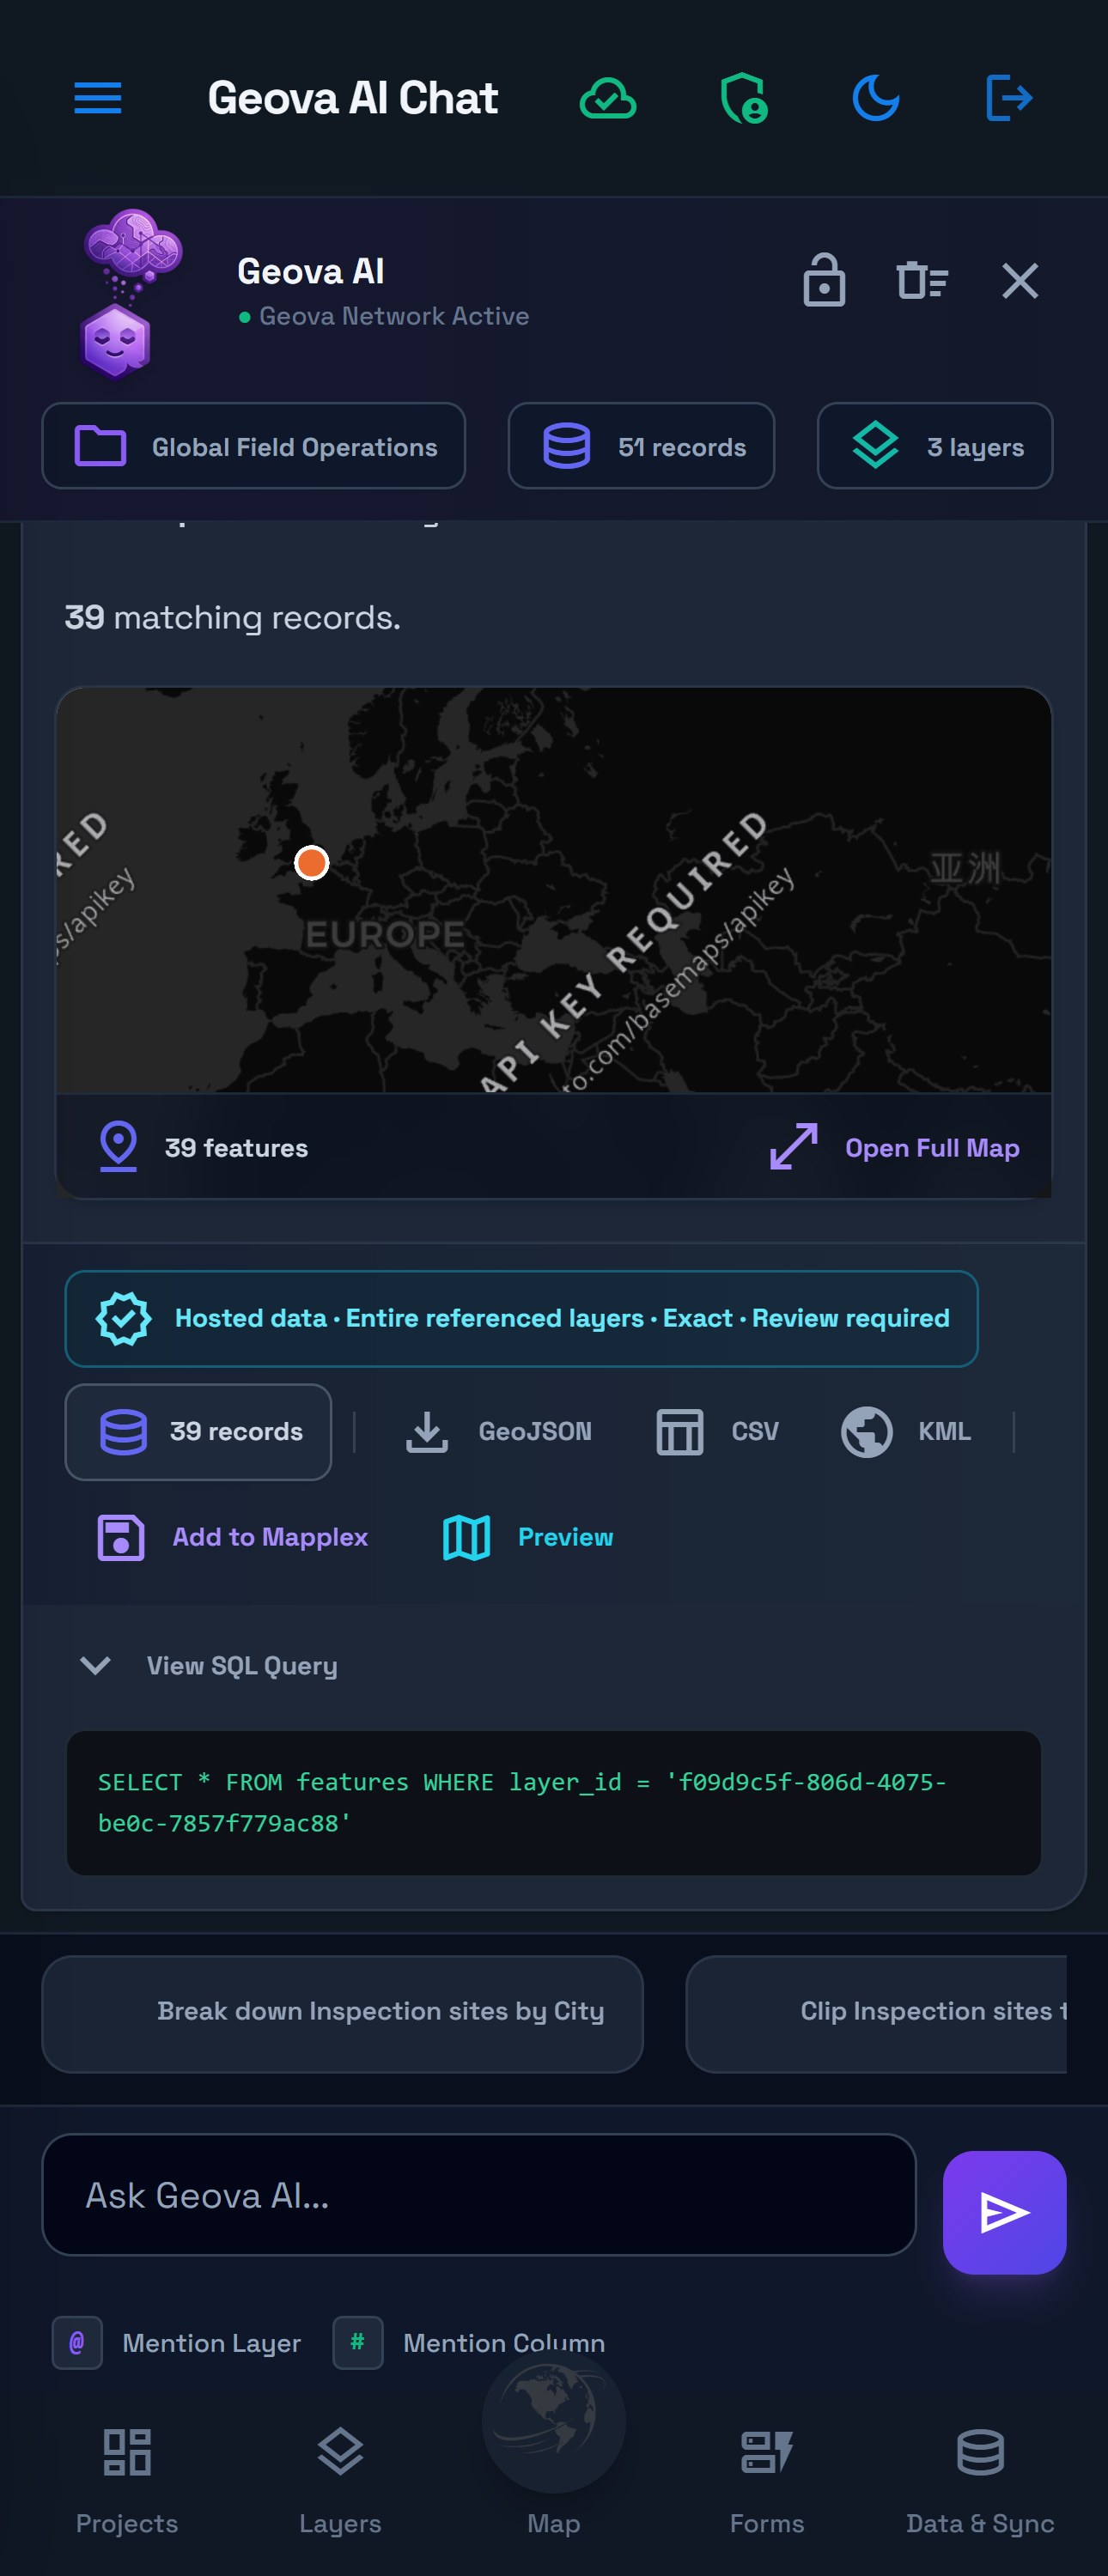
When a fresh result offers a map preview, Open Full Map opens that result on the main map. GeoJSON, CSV, KML and Add to Mapplex are separate result actions, subject to access and result availability. An answer does not automatically save a new layer. Temporary result geometry or export controls may be unavailable after reopening a conversation; rerun the question when needed. This walkthrough verified the answers without adding a result layer or exporting an AI result.
6. Compare conditions without confusing groups and sites
Send “Count Inspection sites by Condition”. The verified answer is Fair: 13, Good: 13, Poor: 13. Together these account for all 39 sites.
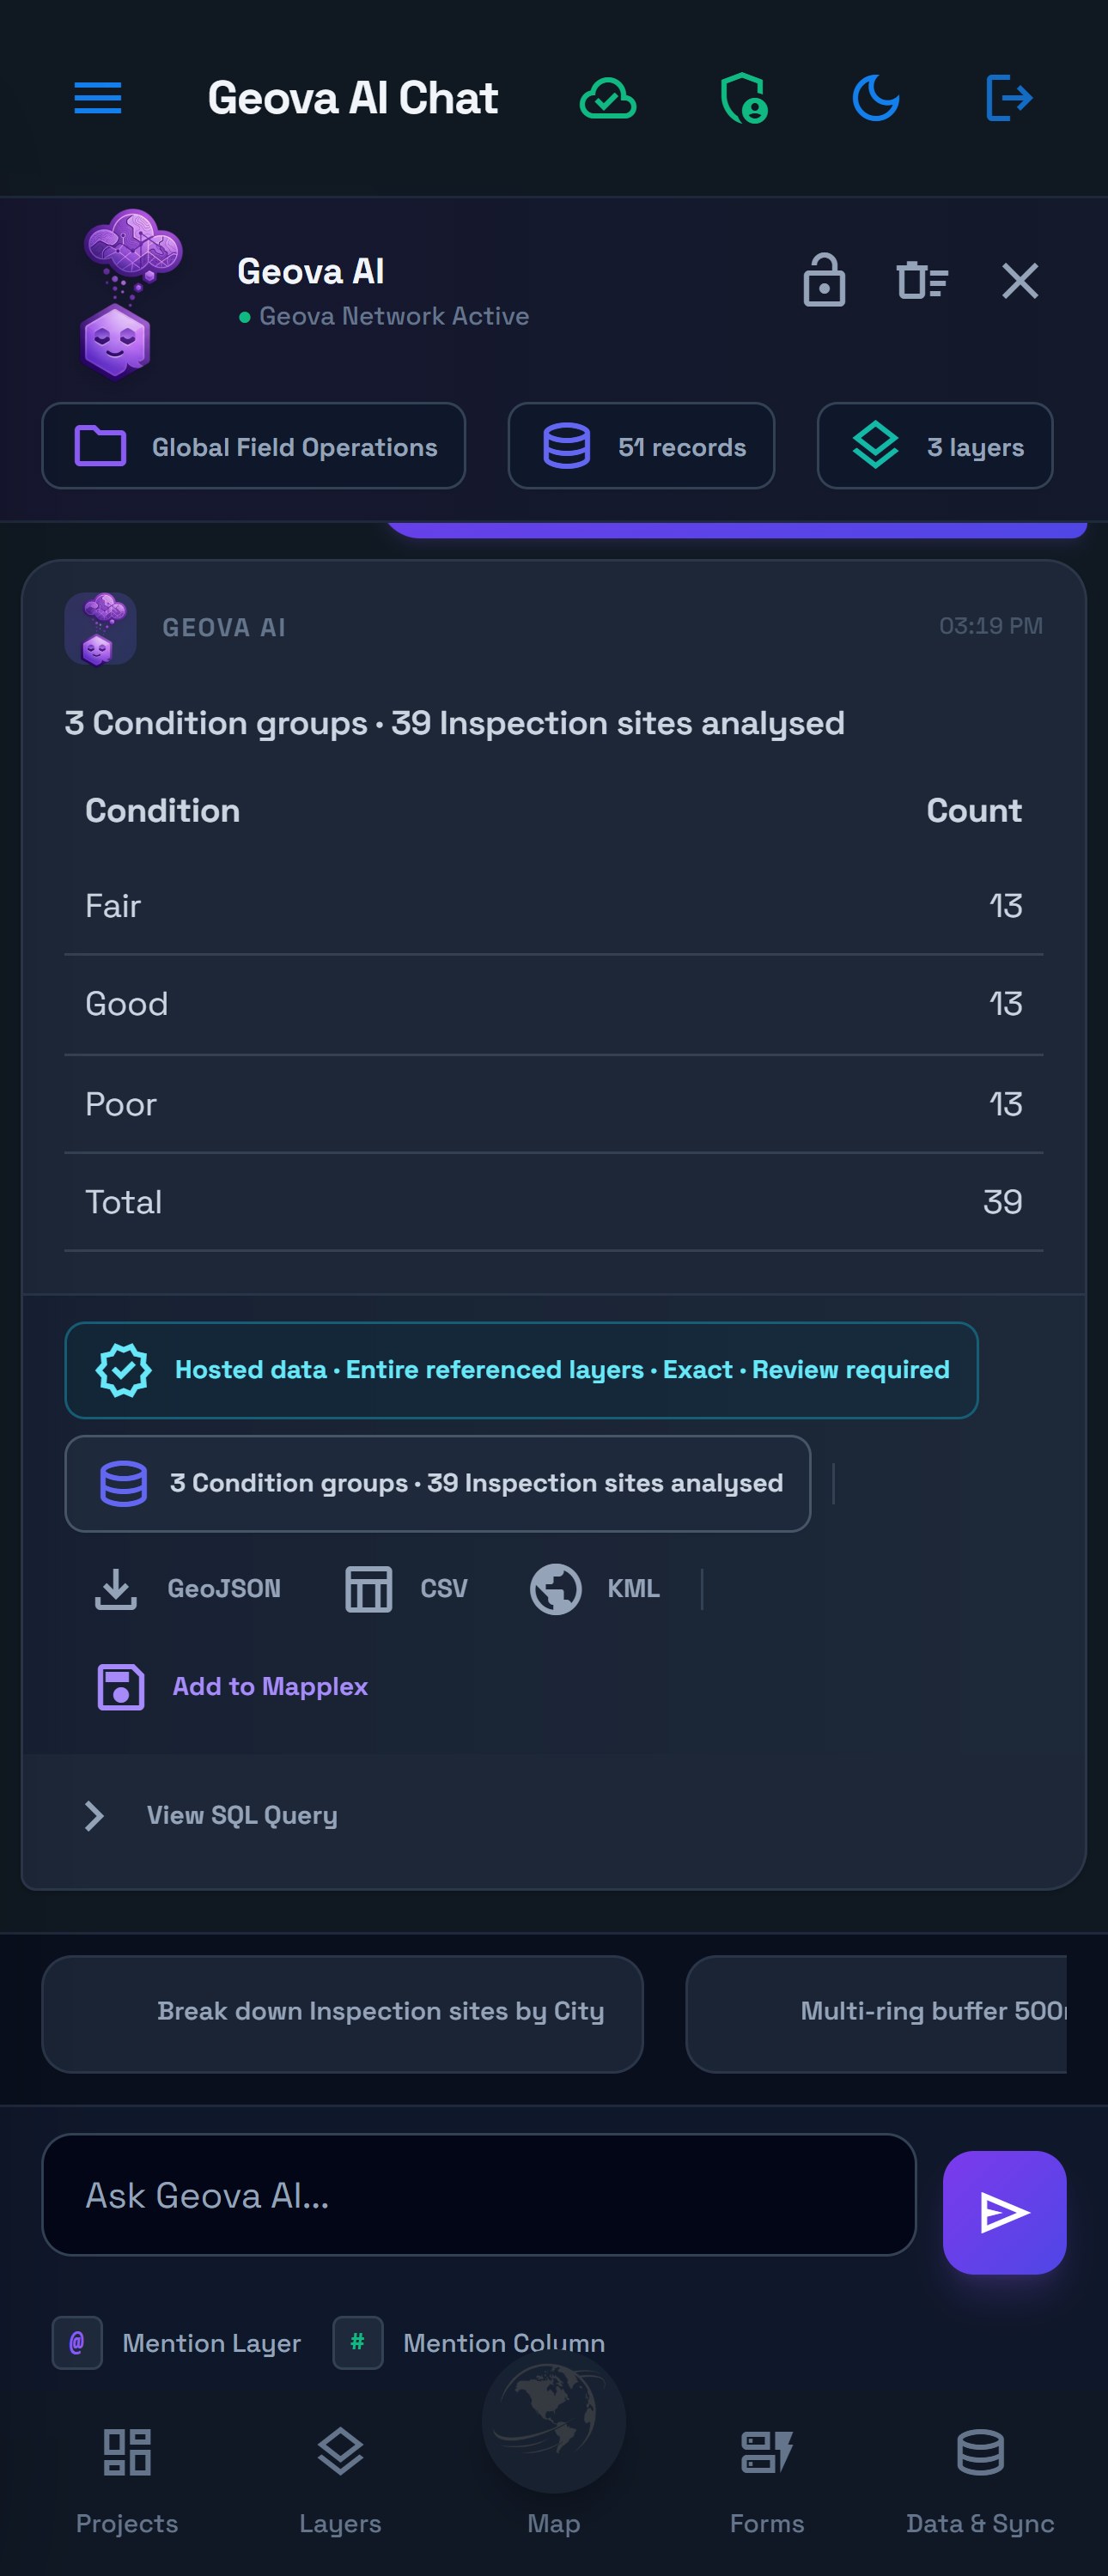
See the tablet mode view
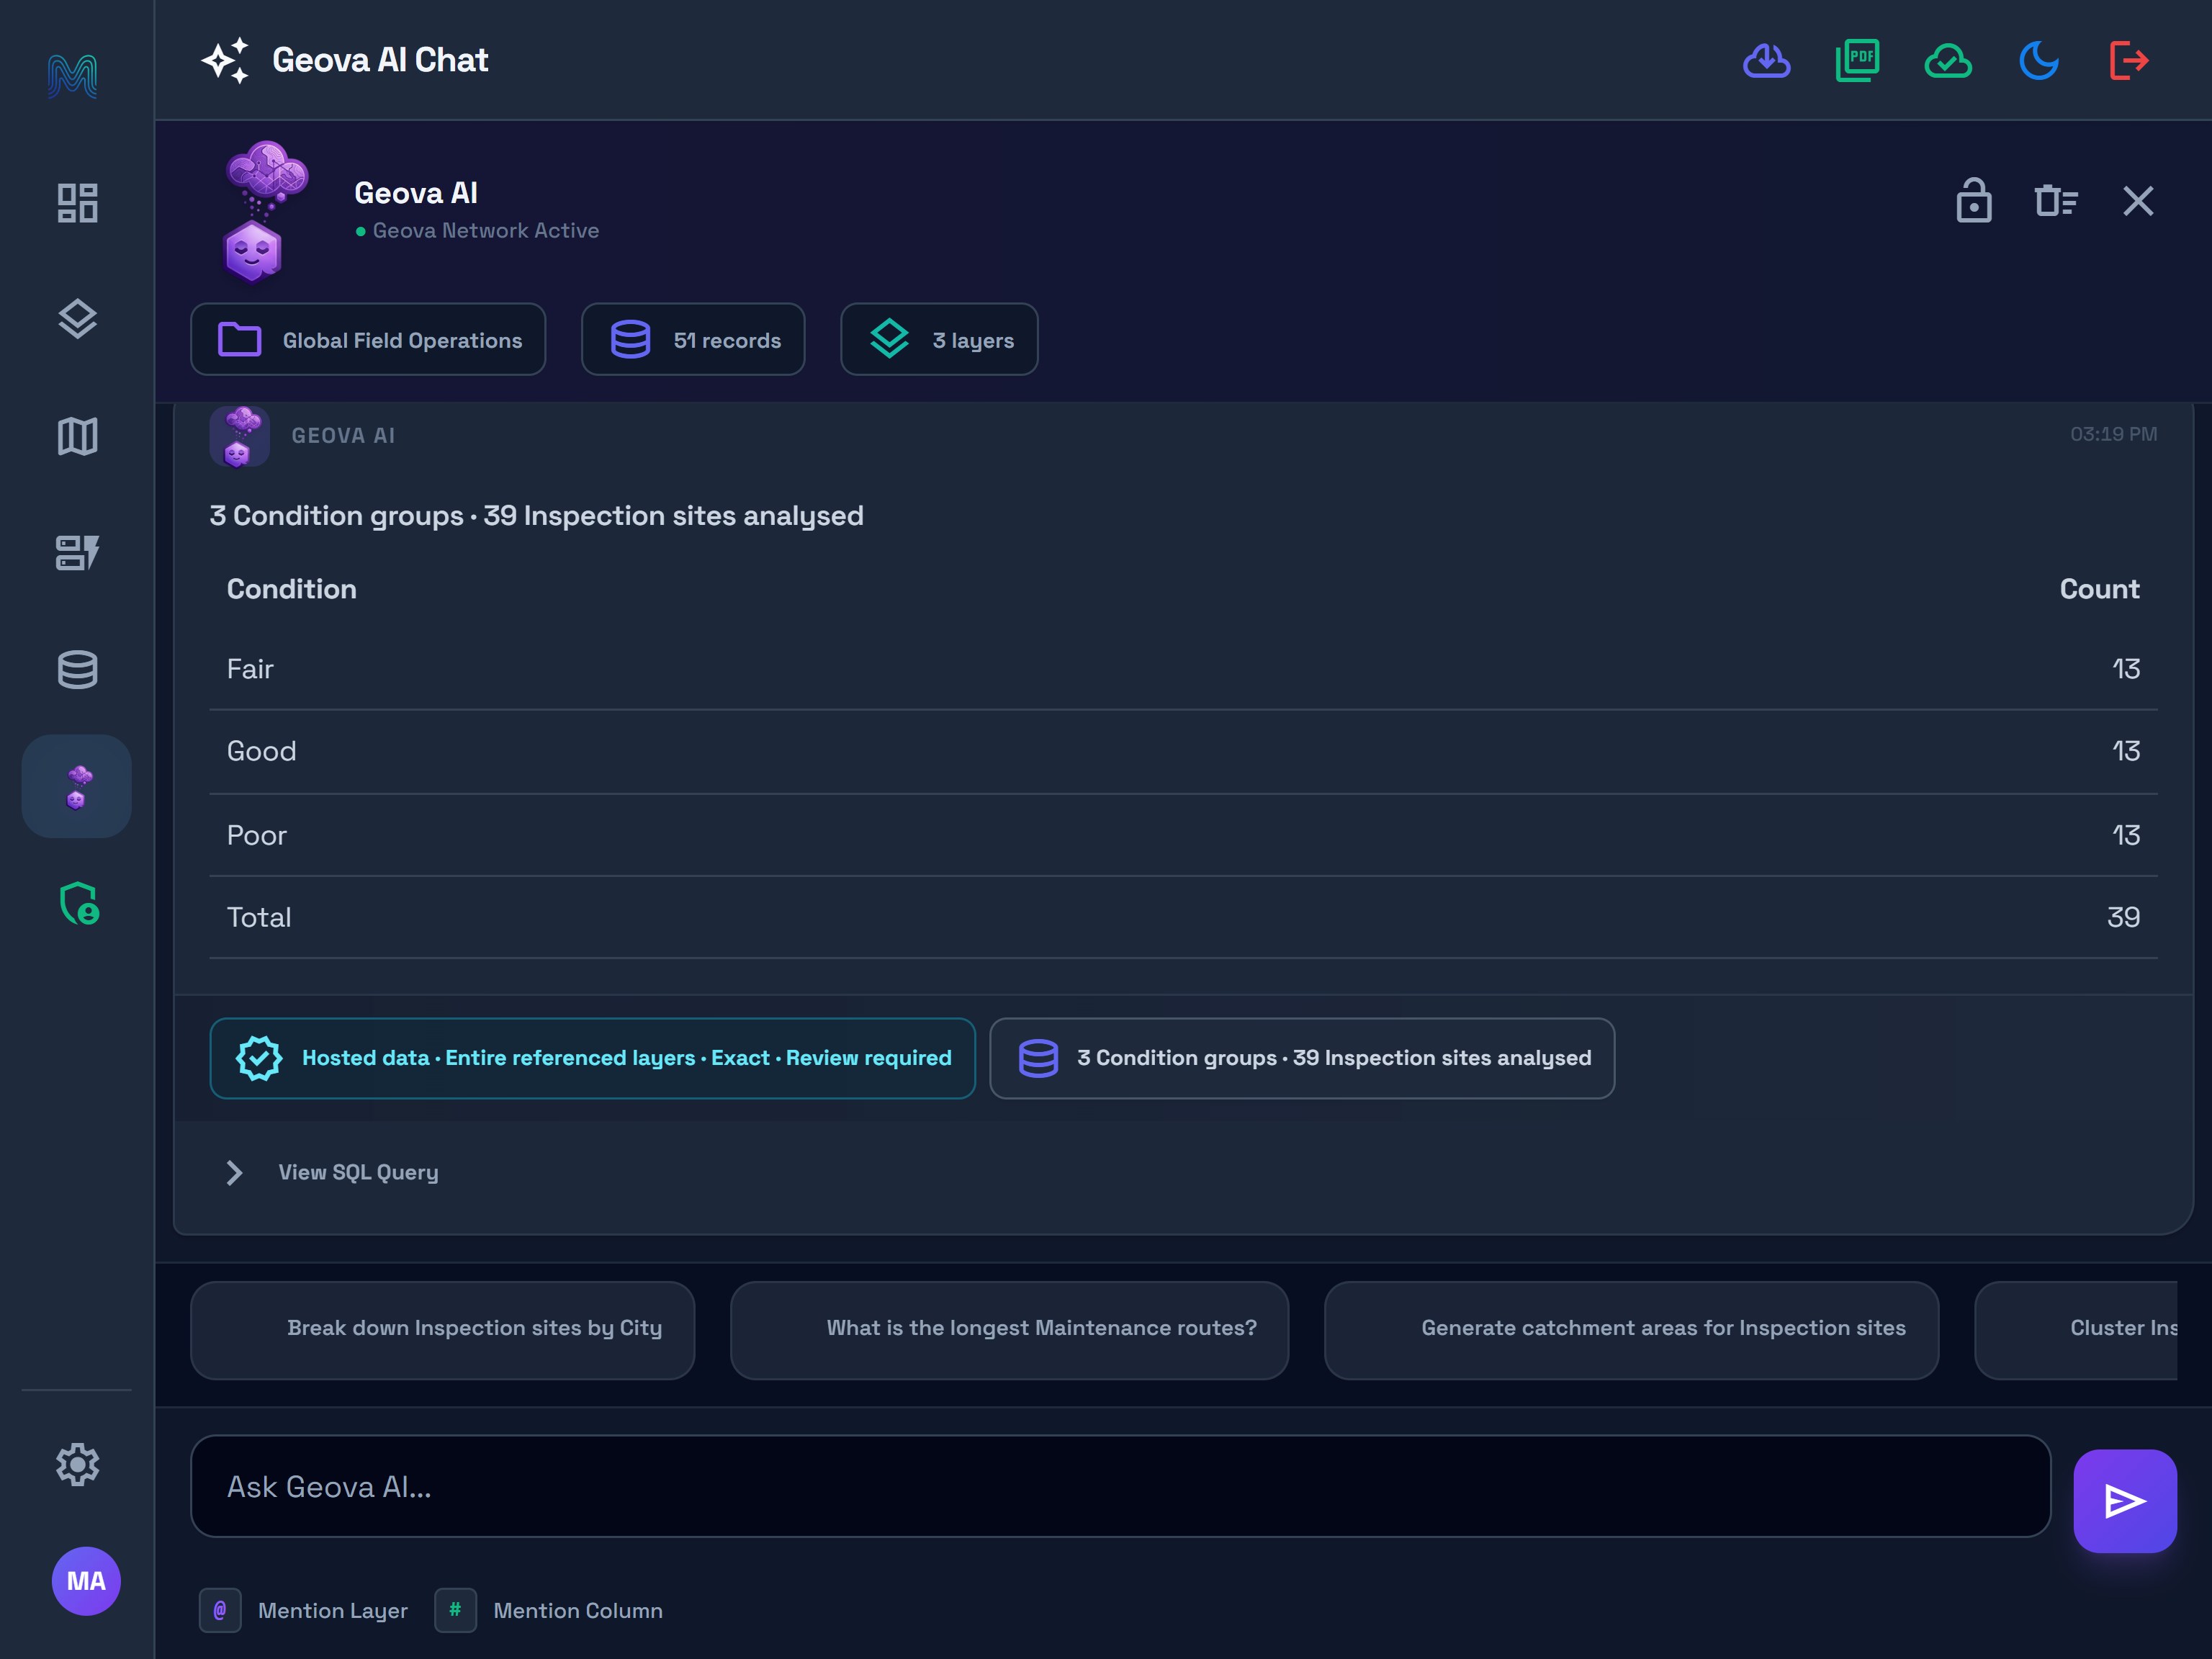
Read 3 Condition groups · 39 Inspection sites analysed as “39 sites divided into three categories.” In the Condition / Count table, each row counts sites in that category: 13 + 13 + 13 = 39. These three rows are a summary of the existing sites; they are not three new inspections.
If the source total cannot be verified, the app shows the available groups with a limitation instead of presenting a confirmed total. A Partial results notice means the groups may not cover the complete requested scope. The same distinction is supported in English and Arabic; always review the scope and limitations.
For a city breakdown, also inspect the stored City values: earlier demo records use labels such as “New York”, while later Lexicon entries can use codes such as new_york. Separate label/code groups should be reviewed before treating them as different places. See Forms and Lexicons.
Try four more questions with real answers: filter Poor sites, find the highest Height, compare route statuses, and ask in Arabic using the actual layer names.
7. Choose the capture workflow separately
Geova AI Chat reviews project data. Fill by voice assists with a single Quick Capture form. They are different entry points; this chat screen does not provide the form's Start microphone control.
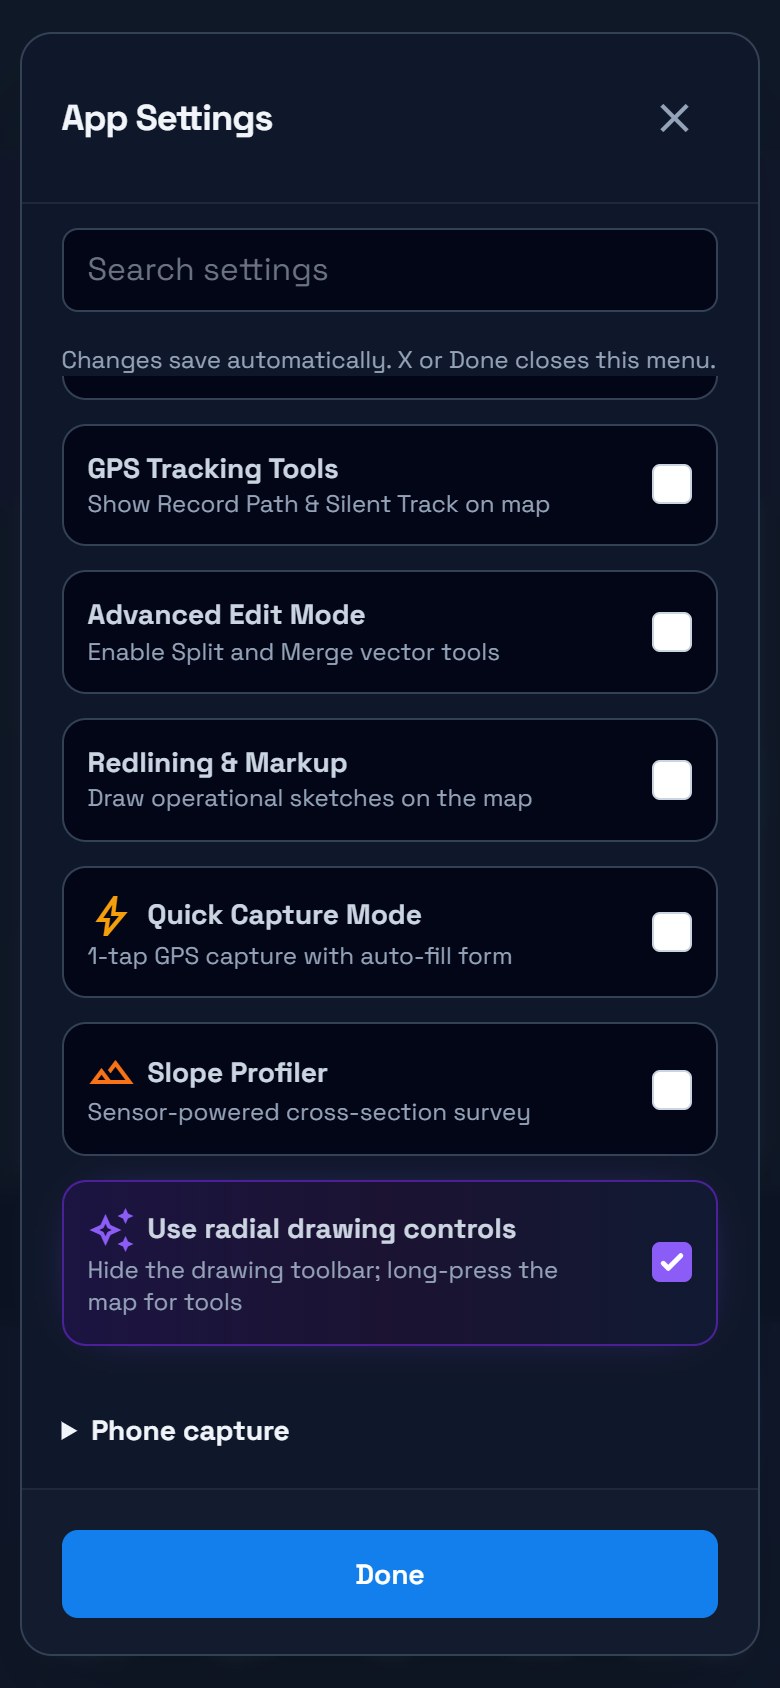
Open Settings → Field tools to choose your capture workflow. Leave Quick Capture Mode off to follow the regular Enter Data workflow. Turn it on when you want the streamlined Point capture form.
8. Check voice readiness before fieldwork
The demo workspace has an eligible plan, but its voice beta admission is not enabled. Opening its Quick Capture form therefore shows normal typed fields without Fill by voice · Beta.
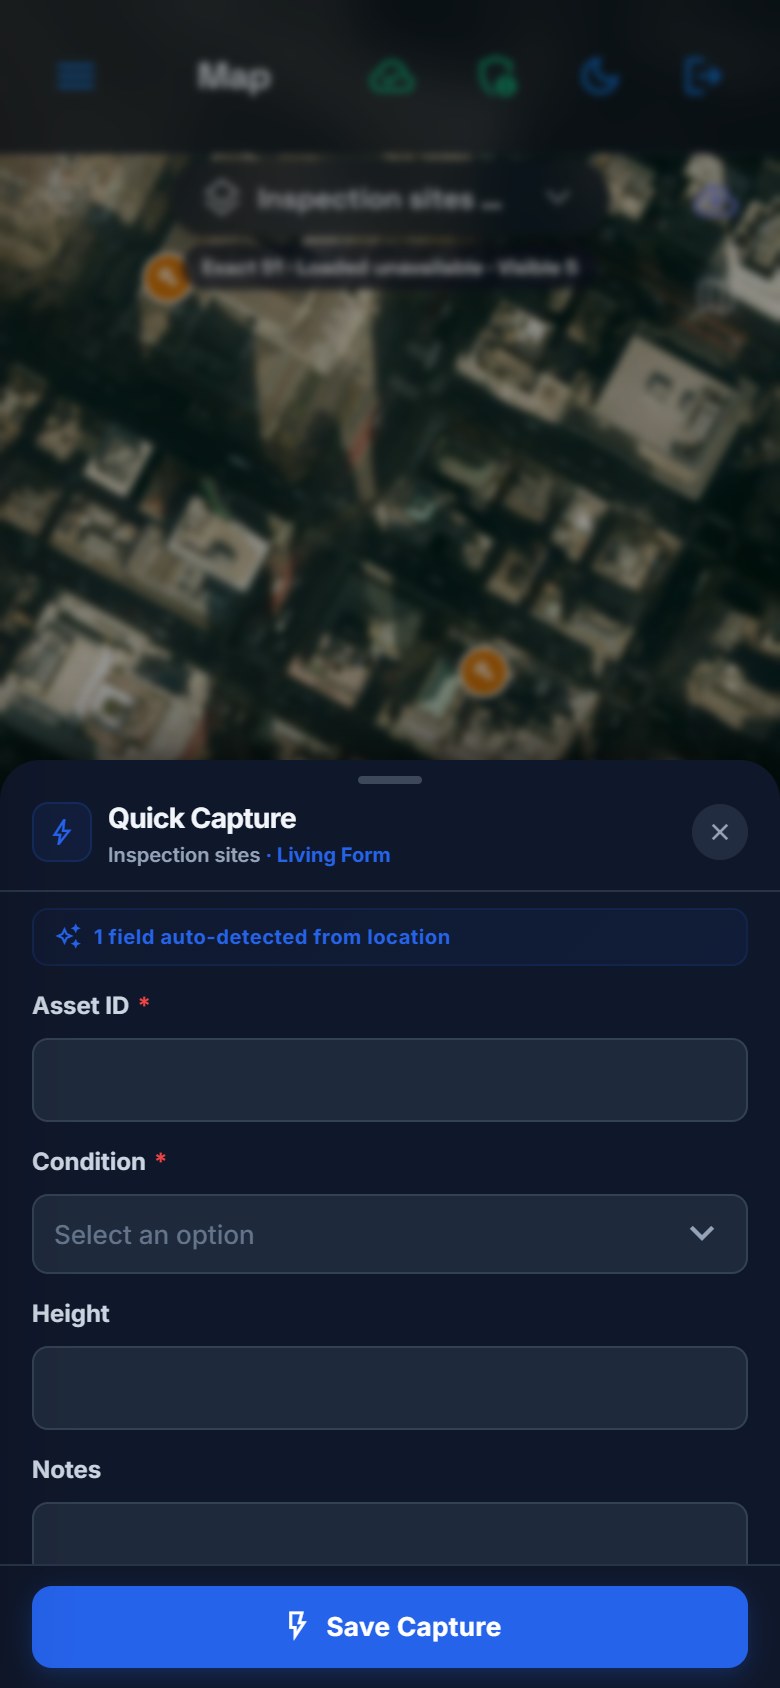
For an enabled workspace, use this sequence:
- Select the intended Point layer, confirm the location, and open the Quick Capture form.
- Expand Fill by voice · Beta, review processing consent and select the speech language.
- In the supported Android app, use Start microphone and check the recognized description. Where the panel is available but the microphone is not, type into Record description or use keyboard dictation.
- Choose Suggest values and review each proposed value, its evidence and any form-rule changes. Complete unresolved fields manually or clarify the description.
- Choose Apply to form, review the complete form, then Save Capture. Applying a suggestion does not save or synchronize the record.
For these demo fields, a useful practice description is “Condition Poor. Notes: identification label needs repair.” Match the actual form choices and review the result before applying it. Voice does not supply or improve the capture coordinate.
A valid suggestion delivered for review uses one workspace AI point. A new valid suggestion is another request; Apply and Save do not add another voice point. Workspace voice admission, permitted AI processing and field-data sharing, connectivity, available points and consent are separate requirements. The dedicated microphone also needs a supported Android speech service and microphone permission.
If the entire panel is missing, continue with normal form entry and ask the workspace administrator to check access. Typing a description is a microphone fallback inside an available voice panel; it does not bypass a missing voice entitlement or workspace admission.
Read Fill a Quick Capture form by voice for supported fields, partial suggestions and cancellation, or voice troubleshooting for recovery. A successful native microphone and suggestion demonstration remains to be verified on an enabled workspace and Android device.
Continue with the Geova AI reference for privacy, local history, result actions and errors, or return to Review, sync and deliver for saved-record delivery.